DIY Fashion Fixes: Extend Clothes Life, Save 75% on Replacements
Advertisements
Embracing DIY fashion fixes allows you to significantly extend the wear of your clothing, potentially saving up to 75% on replacements, while also promoting a more sustainable and personalized approach to your wardrobe.
Advertisements
In an era of fast fashion and constant consumerism, the idea of making our clothes last longer often takes a backseat. However, mastering DIY fashion fixes is not just a quaint hobby; it’s a powerful strategy for extending the life of your favorite garments, saving a substantial amount of money—potentially up to 75% on replacements—and embracing a more sustainable lifestyle. This guide will walk you through practical techniques and insights, empowering you to mend, alter, and rejuvenate your wardrobe with confidence.
The Economic and Environmental Case for Clothing Repair
The average American discards over 80 pounds of textiles annually, contributing significantly to landfill waste. This alarming statistic underscores not only an environmental crisis but also a substantial financial drain on households. Every discarded item represents a missed opportunity for repair and reuse, and a future expense to replace it.
By shifting our mindset from disposal to repair, we unlock a dual benefit: reducing our ecological footprint and bolstering our personal finances. Simple fixes like reattaching a button or mending a small tear can prevent an item from being prematurely retired, saving you the cost of purchasing a new one. Over time, these small savings accumulate, leading to significant financial advantages.
Understanding the True Cost of Fast Fashion
Fast fashion thrives on cheap, rapidly produced clothing designed for short-term wear. While appealing at first glance, the true cost extends beyond the price tag. These garments often use lower-quality materials and construction, leading to quicker wear and tear. This cycle encourages frequent purchases, which, ironically, can be more expensive in the long run than investing in fewer, higher-quality items that are maintained and repaired.
- Material Quality: Fast fashion often utilizes synthetic fibers that degrade quickly.
- Construction Standards: Weak seams and poor finishing contribute to early garment failure.
- Environmental Impact: High resource consumption and pollution from manufacturing.
- Financial Strain: Constant need for new purchases due to rapid deterioration.
The Sustainability Angle: A Greener Wardrobe
Beyond personal savings, repairing clothes is a powerful act of environmental stewardship. The fashion industry is a major contributor to global pollution, from water usage and chemical dyes to carbon emissions from transportation. Extending the life of a garment by even a few months can significantly reduce its environmental impact. This approach aligns with the principles of a circular economy, where resources are kept in use for as long as possible.
Imagine the collective impact if every household embraced basic garment repair. The reduction in textile waste, resource consumption, and pollution would be immense. It’s a tangible way for individuals to make a difference, one stitch at a time, moving towards a more sustainable and responsible consumption model.
In conclusion, the decision to engage in clothing repair is a pragmatic one, offering clear economic advantages by reducing replacement costs, and a vital environmental contribution by minimizing waste and resource depletion. It’s an investment in both your wallet and the planet.
Essential Tools and Materials for Your DIY Repair Kit
Embarking on your journey of DIY fashion fixes doesn’t require an elaborate setup. A basic, well-stocked repair kit is often all you need to tackle most common clothing ailments. Having the right tools at hand makes the process less daunting and more efficient, transforming potential frustrations into satisfying accomplishments.
Starting with a few key items will build a solid foundation for all your mending and altering needs. You’ll find that many of these tools are inexpensive and readily available, proving that you don’t need a professional studio to achieve professional-looking results.
The Core Sewing Essentials
The heart of any clothing repair kit lies in its sewing supplies. These are the fundamental items you’ll reach for most often, from securing loose buttons to patching small holes. Investing in good quality versions of these basics will make your repair work much easier and more durable.
- Needles: A variety pack with different sizes and types (sharps for general sewing, darning for thicker fabrics).
- Thread: A selection of neutral colors (black, white, grey, navy) and a few bright colors for decorative touches or matching specific garments. Opt for all-purpose polyester thread for strength.
- Scissors: A small, sharp pair specifically for fabric to ensure clean cuts, and a larger pair for general use.
- Pins: Essential for holding fabric in place before sewing.
- Thimble: Protects your finger when pushing needles through tougher fabrics.
- Seam Ripper: Invaluable for carefully undoing stitches without damaging fabric.
Beyond the Basics: Useful Additions
While the core essentials cover most tasks, a few additional items can significantly expand your repair capabilities and make certain fixes much simpler. These additions are often specialized but incredibly helpful for particular types of damage or alterations.
Consider adding items like fabric glue for quick, no-sew fixes, or iron-on patches for reinforcing worn areas. These can be lifesavers when time is short or when dealing with fabrics that are tricky to sew by hand. A good measuring tape is also crucial for accurate alterations.
Organizing Your Kit
Keeping your tools organized is just as important as having them. A small box, a dedicated drawer, or a sewing basket will prevent items from getting lost and ensure everything is within easy reach when inspiration (or a mending emergency) strikes. A tidy kit encourages regular use and makes the repair process enjoyable rather than a chore.
Having a well-equipped and organized repair kit is the first step towards confidently tackling DIY fashion fixes. With these tools at your disposal, you’re ready to mend, alter, and extend the life of your wardrobe efficiently and effectively.
Mastering Basic Mending Techniques for Longevity
Once you have your repair kit assembled, the next step is to familiarize yourself with fundamental mending techniques. These aren’t complicated skills reserved for expert tailors; they are practical, accessible methods that anyone can learn. Mastering these basics will empower you to address common clothing issues, transforming worn items into beloved garments with renewed life.
The beauty of these techniques lies in their simplicity and versatility. From a small tear to a missing button, a few stitches can often make all the difference, preventing minor damage from escalating into irreparable flaws. This section will guide you through the most common and effective mending methods.
The Art of Button Replacement
A missing button is one of the most frequent and frustrating clothing mishaps. Fortunately, it’s also one of the easiest to fix. Learning how to securely reattach a button is a foundational skill that can save many garments from an early retirement.
When replacing a button, always choose a strong thread that matches your garment or the original button thread. Use a double strand for extra durability. For buttons with two holes, sew through each hole several times. For four-hole buttons, you can sew in an ‘X’ pattern or two parallel lines. Remember to leave a small ‘shank’ of thread under the button before knotting off, which allows fabric to sit comfortably beneath it.
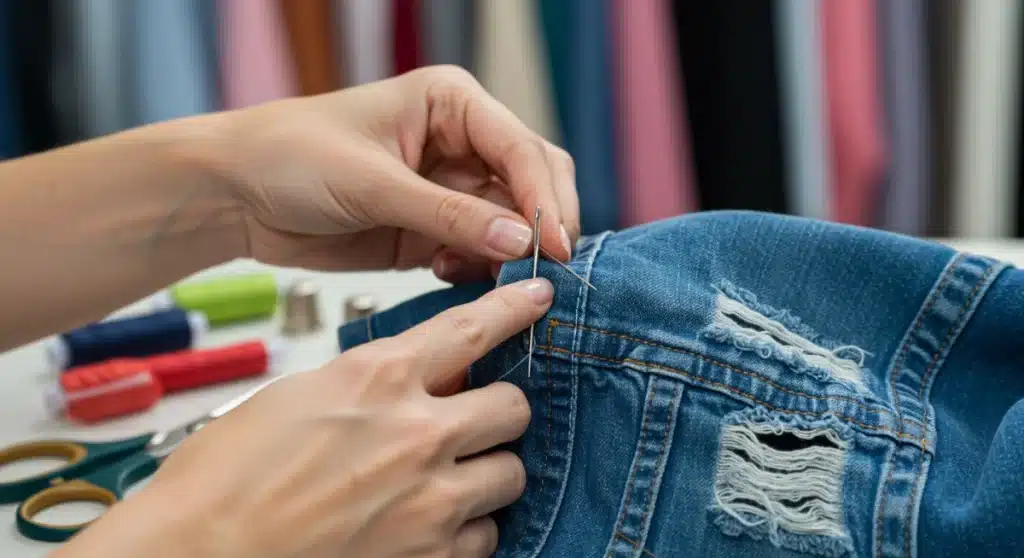
Patching Tears and Holes
Holes and tears might seem intimidating, but with the right approach, they are entirely mendable. Patching is an excellent method for reinforcing weak areas or covering damage, especially in jeans, shirts, or children’s clothing. You can opt for an invisible mend or a decorative patch that adds character.
For a discreet repair, choose a patch fabric that closely matches the original in color and texture. Trim the frayed edges around the hole, then place the patch on the underside of the garment, extending beyond the hole. Use a running stitch or a whipstitch to secure the patch, working from the inside. For visible, decorative patches, get creative with contrasting fabrics and embroidery!
Hemming: A Simple Adjustment
An unraveling hem can quickly make a garment look unkempt. Learning to re-hem trousers, skirts, or dresses is a straightforward skill that instantly revitalizes an item. Whether by hand or machine, a neat hem gives a professional finish.
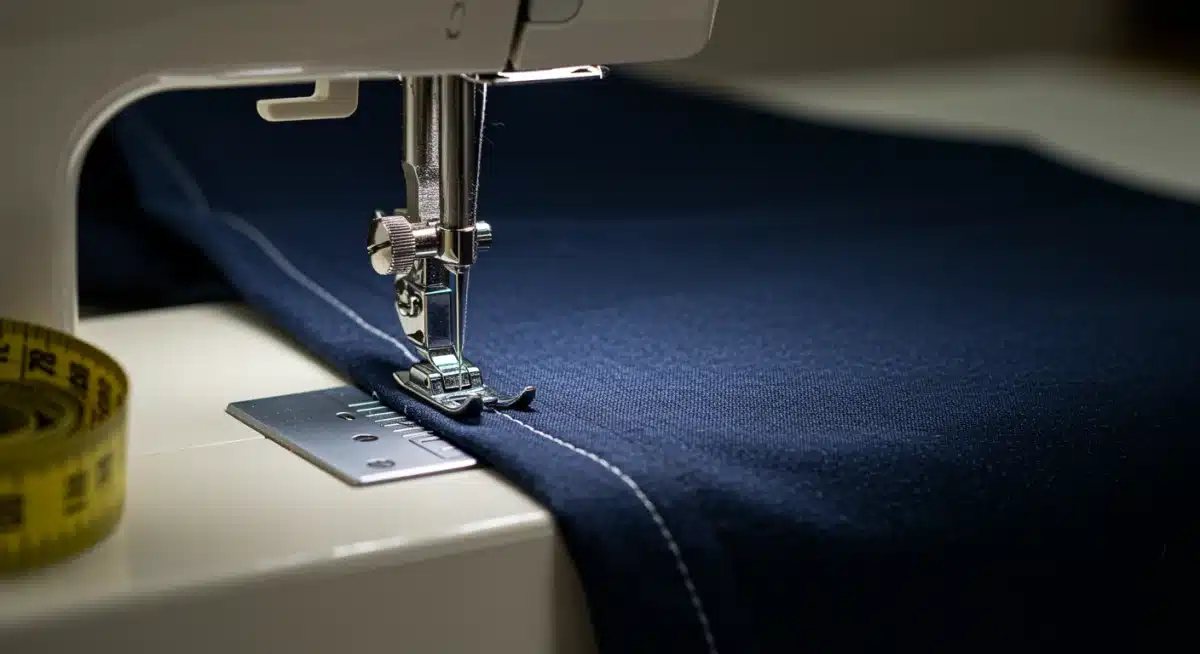

For hand-hemming, use a slip stitch or blind hem stitch for an almost invisible finish. If using a sewing machine, a simple straight stitch or zigzag stitch along the folded edge will do. Always press the hem flat before stitching to ensure a crisp, even line. This simple adjustment can save ill-fitting items from being discarded.
By mastering these basic mending techniques, you gain invaluable skills that significantly extend the wearable life of your clothing. These DIY fashion fixes are not just about repair; they’re about reclaiming control over your wardrobe and reducing consumption.
Creative Upcycling and Customization: Beyond Simple Repairs
While mending focuses on restoring garments to their original state, upcycling and customization take DIY fashion fixes a step further. This approach involves transforming old or damaged clothes into something new, stylish, and entirely unique. It’s about seeing potential where others might see waste, breathing new life into forgotten pieces, and expressing your personal style without buying new.
Upcycling is not only a creative outlet but also a powerful tool for sustainability. By repurposing existing materials, you reduce the demand for new production and divert textiles from landfills. This section explores various ways to creatively transform your wardrobe.
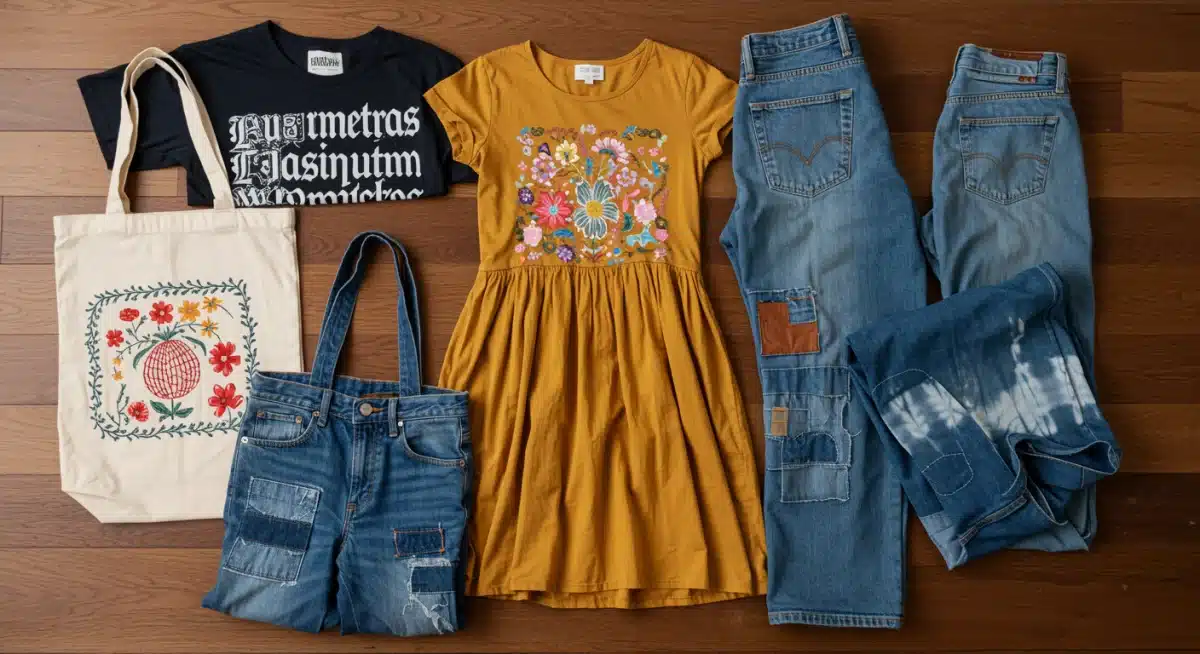
Transforming Old into New: Upcycling Ideas
The possibilities for upcycling are limited only by your imagination. A stained t-shirt can become a reusable tote bag, worn-out jeans can be transformed into stylish shorts or a skirt, and an oversized shirt can be tailored into a more fitted top. These transformations are often simpler than they appear and can result in truly one-of-a-kind pieces.
- T-shirt to Tote Bag: Cut off sleeves and neckline, then hem and reinforce the bottom.
- Jeans to Shorts/Skirt: Cut to desired length, hem, and add embellishments.
- Oversized Shirt into Fitted Top: Take in side seams, adjust sleeve length, or add darts.
- Sweater into Pet Bed: Stitch up the bottom, stuff with old fabric, and sew the opening.
Customization: Adding Personal Flair
Even perfectly good clothes can benefit from a touch of customization. Adding embroidery, patches, fabric paint, or even simple dye can completely change the look and feel of a garment. This is an excellent way to update out-of-style pieces or to make an item truly reflect your personality.
Consider techniques like visible mending, where patches and stitches are deliberately made to stand out, celebrating the repair rather than hiding it. Dyeing faded clothes a new, vibrant color can give them a second life. Even small details, like changing buttons or adding a decorative trim, can have a significant impact on an item’s overall aesthetic.
Resourcefulness and Inspiration
Finding inspiration for upcycling and customization is easier than ever. Social media platforms, online tutorials, and craft communities are brimming with ideas and step-by-step guides. Don’t be afraid to experiment with different techniques and to combine elements from various sources. The key is to start small, build confidence, and let your creativity guide you.

Through creative upcycling and customization, your wardrobe becomes a canvas for self-expression and a testament to sustainable living. These advanced DIY fashion fixes not only save money but also contribute to a more unique and environmentally conscious personal style.
Care and Maintenance: Preventing Damage Before It Happens
While mastering DIY fashion fixes is invaluable for extending the life of your clothes, an equally important aspect is proactive care and maintenance. Many common clothing issues, from fading colors to weakened fibers, can be prevented or significantly delayed with proper garment care. By understanding how to properly wash, dry, and store your clothes, you can minimize wear and tear, reducing the need for frequent repairs and replacements.
Good maintenance habits are the first line of defense against clothing deterioration. They not only preserve the appearance and integrity of your garments but also contribute to their overall longevity, ensuring your favorite pieces stay in rotation for years to come.
Understanding Fabric Care Labels
The small tags sewn into our garments contain a wealth of information crucial for their proper care. Fabric care labels provide specific instructions on washing temperature, drying methods, ironing, and bleaching. Ignoring these symbols can lead to shrinking, stretching, fading, or damage to delicate fabrics.
Take a few moments to decipher these symbols. For instance, a tub with a number indicates the maximum washing temperature, while a square with a circle signifies tumble drying. Knowing these basics will guide your laundry routine and prevent accidental damage, making your clothes last longer and look better.
Washing Wisely
How you wash your clothes has a profound impact on their lifespan. Over-washing, using harsh detergents, or washing at too high a temperature can degrade fibers, fade colors, and weaken stitching. Adopting gentler washing practices can dramatically extend the life of your garments.
- Sort Clothes: Separate by color, fabric type, and level of dirtiness.
- Use Cold Water: Generally sufficient for most clothes and prevents fading and shrinking.
- Gentle Cycle: Use for delicate items to reduce agitation.
- Appropriate Detergent: Use the recommended amount; more isn’t always better.
- Turn Inside Out: Protects the outer surface from friction and fading.
Drying and Storage Best Practices
The drying process can be just as damaging as washing if not done correctly. High heat from tumble dryers can cause shrinkage, weaken elastic, and contribute to pilling. Air-drying is often the gentlest option, while proper storage prevents stretching, creasing, and pest damage.
Whenever possible, air-dry clothes on a rack or hang them on appropriate hangers. For items that must be tumble-dried, use a low heat setting. When storing, fold heavy knits to prevent stretching, hang shirts and dresses on padded hangers, and ensure your closet is clean and pest-free. These simple habits collectively form a powerful strategy for garment longevity, reducing the need for future DIY fashion fixes.
Advanced Repair Techniques: Taking Your Skills Further
Once you’ve mastered the basic mending techniques, you might feel ready to tackle more complex DIY fashion fixes. Advanced repair techniques allow you to address a wider range of issues, from replacing zippers to altering garment fit, further extending the life of your clothes and unlocking even greater savings. These skills require a bit more practice and patience, but the results are incredibly rewarding.
Moving beyond simple hand-stitching opens up a world of possibilities for garment restoration and personalization. While a sewing machine can be a great asset for these tasks, many can still be accomplished with careful hand-sewing and a good understanding of construction.
Zipper Replacement: A Common Challenge
A broken zipper often leads to an otherwise perfectly good garment being discarded. Learning how to replace a zipper, whether in pants, skirts, or jackets, is a highly valuable skill. It involves carefully removing the old zipper and integrating a new one, ensuring it functions smoothly and looks professional.
This repair typically requires a sewing machine with a zipper foot, though it can be done by hand with precision. The key is to unpick the old stitches carefully, align the new zipper, pin it securely, and then stitch it in place. There are many online tutorials available that provide detailed step-by-step instructions for various zipper types.
Taking in or Letting Out Seams
Our bodies change, and so do our preferences for fit. Altering seams to take in or let out a garment can transform an ill-fitting item into a perfect fit, making it wearable again. This technique is particularly useful for dresses, skirts, and trousers.
Taking in a seam involves stitching a new, narrower seam line parallel to the original, then trimming the excess fabric. Letting out a seam is possible if there’s enough seam allowance present, requiring careful unpicking of the original seam and stitching a new one further out. Always try on the garment and pin adjustments before sewing to ensure the desired fit.
Darning Knits and Socks
Holes in knitwear, especially socks and sweaters, are common but easily mendable with darning. Darning involves weaving new threads across a hole to create a reinforced fabric patch, making the item wearable again and preventing the hole from growing larger. This traditional technique is surprisingly simple and very effective.
Using a darning needle and matching yarn, you create a grid of stitches over the hole, first in one direction and then weaving perpendicular stitches through them. This creates a strong, flexible repair that integrates seamlessly with the original knit. It’s a testament to how simple techniques can provide lasting solutions for DIY fashion fixes.
By venturing into these advanced repair techniques, you not only save more money but also gain a deeper appreciation for the craftsmanship of clothing. These skills transform you from a consumer into a capable creator, further solidifying your commitment to a sustainable and personalized wardrobe.
Budgeting for Sustainability: The Financial Impact of DIY Fixes
The financial benefits of embracing DIY fashion fixes are substantial and often underestimated. In a world where clothing costs continue to rise, and the pressure to keep up with trends is immense, repairing and maintaining your existing wardrobe offers a powerful antidote to overspending. By systematically applying repair and care strategies, households can realize significant savings, reallocating funds to other priorities or simply boosting their savings.
This approach moves beyond just saving the cost of a single replacement; it fosters a long-term mindset of resourcefulness and financial prudence, turning every stitch into a saving and every repair into an investment in your financial well-being.
Calculating Your Savings: A Practical Example
Let’s consider a practical scenario. Imagine a favorite pair of jeans that develops a small tear, a shirt that loses a button, and a dress with a frayed hem. Without DIY skills, these items might be discarded, leading to replacement costs:
- New Jeans: $50 – $100
- New Shirt: $20 – $50
- New Dress: $40 – $80
The total replacement cost could easily range from $110 to $230. However, with minimal investment in a sewing kit (perhaps $15-$25 initially, with negligible ongoing costs for thread/needles), these items can be repaired for pennies. The savings on just these three items alone could be well over 75% of the replacement cost.
Long-Term Financial Benefits and Investment
The impact of DIY fixes extends far beyond individual garments. Over a year, or even several years, the cumulative savings from repairing instead of replacing can be truly remarkable. This freed-up capital can then be invested elsewhere, such as in higher-quality, durable clothing that will last even longer, or in other personal financial goals.
Furthermore, learning these skills represents an investment in yourself. The ability to repair and maintain your belongings reduces reliance on external services and makes you more self-sufficient. This newfound independence has an intangible value that complements the tangible financial gains. It’s about building resilience in your personal finances and consumption habits.
The Value of a Longer Wardrobe Lifespan
Extending the average lifespan of your clothing items directly translates to needing fewer new purchases over time. This reduces your overall clothing budget without sacrificing style or quality. Instead of constantly chasing trends, you can focus on building a versatile, high-quality wardrobe that serves you well for years, all thanks to the power of DIY fashion fixes.
In essence, embracing DIY clothing repair is a smart financial strategy that empowers you to take control of your spending, reduce waste, and cultivate a more sustainable and economically sound approach to your personal style. The savings truly add up, making it a worthwhile endeavor for any budget-conscious individual.
| Key Aspect | Description |
|---|---|
| Economic Savings | Repairing clothes can save up to 75% on replacement costs, significantly reducing household expenses over time. |
| Environmental Impact | Extends garment life, reducing textile waste in landfills and lowering the fashion industry’s carbon footprint. |
| Essential Skills | Mastering basic mending (buttons, hems, patches) empowers individuals to maintain their wardrobe independently. |
| Creative Upcycling | Transforming old clothes into new, unique items adds personal style and further reduces consumption. |
Frequently Asked Questions About DIY Fashion Fixes
For beginners, the most accessible DIY fashion fixes include reattaching loose buttons, mending small seams, patching minor holes, and re-hemming unraveling edges. These tasks require minimal tools and offer immediate, satisfying results, building confidence for more complex repairs.
You can save a significant amount, potentially 75% or more on replacement costs. For instance, replacing a $60 pair of jeans due to a small tear when a patch costs pennies. Over time, these individual savings accumulate into substantial financial benefits, reducing your overall clothing budget.
A basic kit should include a variety of hand-sewing needles, all-purpose polyester thread in neutral colors, sharp fabric scissors, sewing pins, a thimble, and a seam ripper. These tools are affordable and sufficient for most common mending tasks.
Absolutely! Simple alterations like taking in side seams on a shirt or shortening trouser hems are excellent DIY fixes. These adjustments can transform ill-fitting garments into perfectly tailored pieces, extending their wearability and making them feel new again.
By repairing and extending the life of your clothes, you reduce textile waste in landfills and decrease the demand for new clothing production. This lessens the environmental impact associated with manufacturing, transportation, and disposal, promoting a more circular and sustainable fashion economy.
Conclusion
Embracing DIY fashion fixes is far more than just a frugal choice; it’s a strategic decision that empowers you to take control of your wardrobe, finances, and environmental impact. From mastering basic mending techniques like button replacement and patching to exploring creative upcycling and diligent garment care, every effort contributes to a longer life for your clothes and significant savings in your pocket. By integrating these practices into your routine, you not only reduce your reliance on fast fashion but also cultivate a more sustainable, personalized, and economically sound approach to personal style. The journey of transforming your relationship with your clothes is a rewarding one, proving that a little creativity and effort can yield substantial benefits for both you and the planet.


")

